Friday, 9 December 2016

A Beginners Guide to Seascape Photography


Seascapes are often seen as a subset of landscape photography. This is true, but I feel that seascapes have their own specific techniques that need to be thought about when you are shooting a scene. The typical sea scene could be a warm sandy beach, blue sky and some palm trees. That is generally the kind of image I try and avoid. For something more dramatic, you may want to try to shoot at sunset and try and capture something unique, rather than a typical postcard shot. When you get it right, your seascape scene should be breathtaking and exciting to look at. It should show the scene, but not look like the kind of shot that anyone could have shot. That means, you may have to scout for some unique or unusual vantage points along the coast.
Safety first please

Seascape photography can be dangerous. Very often you will be hiking over slippery and sharp rocks, the tide may be rising and the waves might be coming in closer and closer. Always be aware of your surroundings and be careful to observe what is happening around you. On more than one occasion, I have been trapped on a rocky outcrop with nothing but wild sea around me. Getting back onto dry land was a relief and an ordeal on those occasions. I have also been completely soaked by freak waves at times and almost lost my camera into the water more than once. So yes, seascape photography can be a little dangerous, but the results are well worth it. The first rule is always, safety first. If possible, go out with a fellow photographer so that there are two of you to help each other if necessary. So, with that disclaimer out of the way, here are some tips on how to set up to get some great seascape images.
Location considerations:

1. Tide

If you don’t know the tidal movements or the tidal range, it’s a good idea to find out. Most coastal towns will have a tide table or chart available, this is important information to know before you go out on your shoot. You can also simply Google “tide table for (city or town)” and all the tide times and measurements should be there. This is important because you may scout a location at low tide, only to return at high tide and find that the rock you were planning to stand on is now submerged under water. Also, the tide can affect the water movement and wave size. If it is high tide, there may not be as much water movement as you would like. It is also a good idea to chat with local photographers or fishermen to find out how the tide is moving.


The incoming tide trapped me on this rocky outcrop

2. Weather

Most coastal areas can be unpredictable from a weather perspective. A storm can roll in pretty quickly over a coastal town. Be sure to check the weather forecast for three or four hours before you plan to shoot, and an hour or two after you plan to end your shoot. Sometimes the weather and particularly the wind, can cause the conditions to become difficult to shoot in. One of my favourite apps on my iPhone is Accuweather. I use it often when I am in a location that I am unfamiliar with. It is very easy to use and has been about 90% accurate whenever I have used it.

3. Location

You need to decide where you want to shoot. Do you want to shoot from the beach, the rocks, or the elevated cliff? This will determine what kind of personal gear you will need to take with you (hiking boots, long pants, etc.) It is also a good idea to pack an extra sweater or rain jacket as it could become wet or cold very quickly. Be sure to look at where the sun will be setting. There is nothing more frustrating than being in the shadow of a headland with 80% of your scene in shade as the sun goes down. Remember to look out for channels where the sea water may run up into. These channels and gullies along a rocky coastline can be very dangerous as the water may recede when the tide is out, but as the tide comes in, they may be impossible to cross. If you cross the gulley in low tide and try to return at high tide, you may be trapped as the water could be too deep to cross over.


Magnificent light and moving water makes for a great image

4. Lighting

It is easy to forget your headlamp or flashlight when you are walking along the beach in the warm sunlight. You may be at your location until way after dark and when you decide to return, you will realize that it is pitch dark and the path back has changed because the tide has come in. Don’t forget to carry your headlamp or flashlight with you whenever you do any kind of landscape photography, but especially when you do seascape photography. I have been lost on a rocky coastal outcrop a few times and it is more than a little scary. Fortunately, I always carry my headlamp in my camera bag, no matter what, so that has helped me find my way back to the road or my car.


Photography considerations:

1. Shutter speed


Depending on the seascape scene you are shooting, you will have two choices. You can freeze the movement of the waves or you can blur the movement of the water. If you are shooting a seascape scene that includes rocks in the foreground and the water rolling over the rocks, then you may want to blur the water. This will give the water that soft silky effect and the images will look somewhat surreal. To slow things down even further you could use a neutral density filter to make the exposure time even longer. This will have the effect of really softening the water to the point that it may look misty. Depending on what your vision is for the shot, you need to decide how soft you want the water to be. To freeze the action of the water, you will need to be shooting at 1/1000th or faster. I find that freezing the action of the water is not always as dramatic as softening it. Being able to freeze the action is useful if you are shooting surfing or some other water sport.

2. Aperture

As with landscape photography, you will want to have everything from the foreground to the background in focus. That means you will need to be using an aperture of f/8 or smaller. This will also allow you to slow the shutter speed down, and get some soft water in your scene. Make sure that you focus your camera once you have decided on your scene and composition, then switch your camera to manual focus. That way, when the light begins to fade, your lens won’t be hunting to find a focus point.


Look for reflections in a seascape scene

3. Colour or black and white

Seascapes can work very well in black and white. You should shoot your images in colour and convert them afterwards in Photoshop or Lightroom. Both of these image editing suites have great black and white conversion tools and you will be able to make numerous adjustments to your image afterwards. If you shoot in black and white however, you can never get the colour back into the scene. You may try the image in black and white and realize it works better in colour, so be sure to keep shooting in colour.
4. Tripod

You will need a tripod to shoot seascapes effectively. You may be shooting after the sun has set and there is no way you could hold your camera still to get a great shot. Sharpness is key in a good seascape. Portions of your image will be blurred (water) but other parts of the image should be tack sharp (rocks, clouds, etc.) So be sure that everything is very sharp by using a tripod and a cable release if possible. Be aware if you set your tripod up on the sandy shoreline. As the sea comes in, it may cause your tripod to move or sink as the sand may not be firm enough to keep your tripod perfectly still. Always check your image afterwards to be sure that you have the rocks and clouds sharp.

Subject matter

There are no shortage of scenes to shoot in a seascape scene. Some of the following are ideas to look out for on any beach:
Lighthouses – Always fun to shoot and if possible, shoot them in the early evening when the light first comes on.
Rocky outcrops – Moving water and rocky beaches make for great seascape images.
Reflections – if the tide is moving out on a flat beach, you can capture some amazing reflections of the sky on the shiny beach sand.
Colour of light – If you expose properly you can have a warm sky and the blue water in one image. This makes for a beautiful scene.
Storms – This is a little more tricky, but sometimes shooting a raging storm over the sea can make a fantastic shot.

If you live near the sea or are planning to visit the seaside, then try your hand at this genre of photography. The results can be very satisfying and you will be astounded how easy it is to produce consistently good results, once you know how. The important thing is to be sure that you are safe and aware of your surroundings at all times. Don’t be afraid to venture out to try this type of photography, it is a lot of fun and it is worth it for sure.

How to Critique Your Photos Accurately

Ireland Waterfall Landscape Photo

In general, photographers are very good at deciding how much they like someone else’s photo. It isn’t hard — your first reaction to a shot is either positive or negative, and it typically doesn’t change much after that. Things get more complicated, though, when you’re talking about your own work. For me, at least, I find it tough to judge the quality of some photos I’ve taken. Sure, I know when a photo is awful, but what about the other shots? This article covers some tips for looking at your work with a better critical eye.

1) Separating the Event from the Photo

Do you ever find yourself at an incredible location for sunset, camera in hand, after an incredibly difficult hike? Or, maybe you’re photographing a basketball game, and you captured the exact moment that the ball left a player’s hand to score the winning point.
In both of these cases, the situation surrounding the photo is incredibly powerful. In the first example, you feel like you have accomplished something — it took a lot of effort, but you made it to an incredible landscape in time for the best light. In the second example, you managed to capture the defining moment of a basketball game, timing the shot exactly right.
Unfortunately, neither of these cases actually means that you got a good photo.
Maybe, in the first example, your composition simply doesn’t do the scene justice. That’s certainly happened to me; even at a beautiful landscape under the right light, I don’t always come back with a good shot. Or, in the basketball case, there may be other distracting things happening in the photo that take away from the moment you captured.
In situations like these — where the experience of taking the photo is strong — it is very difficult to judge your images objectively. Perhaps you did capture everything that you wanted. But, sometimes, that won’t be true.
Quite often, I take a photo that requires a lot of effort to capture, and then I immediately think of it as my new best shot! That happened with the photo below. To get here, I spent a full day hiking up a mountain, then climbing on a glacier. The whole hike was beautiful and memorable, as well as exhausting — the perfect recipe for a photo that is difficult to judge accurately.
Iceland Glacier Photo
NIKON D800E + 105mm f/2.8 @ 105mm, ISO 100, 1/5, f/16.0
I don’t think this is necessarily a bad photo, and that’s the point. It isn’t awful, and it took a ton of effort to capture. That combination — hard to take, and not immediately worth deleting — made it very difficult for me to judge it accurately.
In hindsight, I can look back and tell that there are some problems with this photo. There isn’t a clear subject, for one, and the foreground is empty. These issues should have been obvious at first, but my memory of taking the shot was so strong that I overlooked them. (Obviously, this is all subjective — you may hate the photo or love it, and that’s fine. This is just my own perspective on the shot, which will be different from yours.)
A month or two later, of course, it became easier to critique this photo accurately. A lot of times, that’s how it happens — you need to wait a little while before you can see things with an unbiased eye. That’s also why I try to wait at least two weeks before posting a new photo on my website or on Facebook.
Sometimes, of course, the opposite is true: your opinion of a photo actually improves over time. Generally, this will happen when one of your quick snapshot photos turns out surprisingly well. Since you don’t have a clear memory of taking that photo, it may be a while before you can judge it accurately (a good reason to revisit your archives).
Again, the best way to solve problems like this is just to wait a bit. Over time, your memory of taking the photo won’t be as strong, and you’ll be better at judging a photo based on its internal qualities. I know of some photographers who, for this exact reason, actually refuse to look at their photos until a month after they’ve returned from a trip. Although I don’t have that much self-control, I certainly understand why they do it.

2) Dealing with Ambiguous Photos

Even if you wait a while, it still isn’t always possible to judge your photos accurately. This is especially true when a photo straddles the line between “decent” and “worth displaying.” One day, you may decide that the photo merits a spot on your website — the next, you might decide that it doesn’t quite make the cut.
Photos like this are always very difficult to judge, and there’s no easy way to tell how good they really are. Still, you have a few ways to try.
To start, as mentioned above, you can give yourself a better perspective if you wait a few weeks before critiquing the shot. If you’ve already waited, though, consider showing your photo to other people — your social media followers, or, ideally, a photographer whose work you respect.
If you decide to put an ambiguously-good photo on your Facebook page, see how many interactions it gets compared to your normal posts. More? Less? The same? This isn’t the best gauge for the actual quality of a photo, but it helps you judge how other people like it. If one of my photos gets half as many interactions as usual, it’s easy to tell that people don’t think it is as good as usual.
For a more accurate critique, though, it’s better to show your work to professional photographers. This could be online or in person, but the goal is to see how another photographer sees the photo. That said, you have to make sure that you talk to someone  who isn’t afraid to tell you when you’ve taken a bad shot — although it can hurt at first, it ultimately helps to be as accurate as possible.
Another tip, one of my favorites, helps after you’ve been editing and looking at a particular photo for a long time. When an image is strongly ingrained in your head, flip the photo horizontally. You can see a mirrored version of the shot, and it tricks your brain into seeing the photo as if it is completely new. (Only do this for photos that you have looked at for a long time — otherwise, the effect doesn’t work.) I covered this tip in more detail in an earlier article.
Ireland Waterfall Landscape Photo
NIKON D800E + 35mm f/1.8 @ 35mm, ISO 100, 30/1, f/16.0
Is this photo worth displaying on my website? It took me a long time to decide that it is, but I’m still conflicted. If you check my site a year from now, it may not be up any more — or, it may have an even more prominent spot.

3) Conclusion

The best way to critique your photos is simply to look at them as objectively as possible. You should have extremely stringent standards — you don’t want to show anyone a bad photo that you took, unless you work for a photography website and are doing it to illustrate a point :)
Most of your photos will be pretty easy to critique, and you’ll generally have a good idea of a photo’s quality after you’ve taken it. However, there will be cases that are more difficult to judge. Typically, this happens because you have a strong emotional response or memory of a particular photo, making it tough to see the image for its actual quality.
When this happens, the best option is to try waiting a while. The longer you wait, the easier it is to separate your memories from the photo itself. If that still doesn’t work, try showing your image to other photographers or flipping it horizontally in post-processing.
Although it’s not easy to critique some photos, it’s always worth the effort. You shouldn’t show your audience mediocre photos, but you also want to display a good shot when you get one. Hopefully, these tips can help you make the final decision.

Wednesday, 7 December 2016

What can we learn from Google's satellite timelapse photography? 

 https://tctechcrunch2011.files.wordpress.com/2016/06/screen-shot-2016-06-17-at-12-41-39-pm.jpg

Evidence of rapid change across the earth’s surface in the past three decades is now readily available, thanks to new technology and satellite imagery compiled by Google that shows the impact of human activity and development on nature.
Using Google’s latest toy, “Timelapse,” it’s possible to scroll over cities, landmarks, and natural wonders, watching as they develop or shrink between 1984 and 2016. The video service pulls more than 5 million satellite images largely from the Landsat project, a satellite imaging service, and pieces them together through Google Earth Engine, a tool used to analyze geospatial information.
Earth Engine takes those images and merges them together to form 33 mosaics, with each corresponding to a specific year. Unlike Google Earth, which allows users to find particular addresses and buildings, Timelapse allows users to scroll and zoom around general areas and watch as the earth’s surface changes from afar.

 What a quick flip through 33 years on earth shows, however, could be cause for concern. In seconds, the toll that human activity has taken on the earth becomes tangibly clear, with glaciers in the Arctic shrinking and sprawling cities both expanding and growing in density.
It takes just over 10 seconds to watch Alaska’s Columbia Glacier, one of the fastest retreating glaciers on the planet, retreat “catastrophically” over the years. As 13 million tons of ice break from the mass daily, Timelapse puts the smaller losses into perspective by showing the dramatic changes that have occurred in the past three decades.
But some wonder if this tool, one of the most comprehensive visual aids in understanding the effects of climate change, can actually implore people to take action against rising temperatures. While information about global warming is readily available now and backed by the vast majority of scientists, only 48 percent of Americans say they believe climate change is the result of human activity, according to a Pew Research Center poll on science.  
“Yet, are human beings capable of assimilating such global perspectives or is our consciousness tragically limited to a pre-space age, even pre-Copernican mentality? Are people only capable of acting on immediate, personal and local concerns, even though images from space can show us the bigger picture?” Jonathan Jones writes in The Guardian.
“This is one of the real problems of our time … it also seems that we can watch any number of videos of expanding cities and vanishing ice without becoming globally conscious,” he continues.
But Timelapse also shows some signs of progress across the globe. In Washington, the video shows movement in an opposite direction, with forests becoming more plush and green as the years pass after the practice of clear-cut logging declined.

JCC Exhibit Showcases ‘Made In China’ Photography

 Pictured is Monika Garami, an award-winning nature and landscape photographer from Warren, Pa., speaking about her contribution to the “Made in China” exhibit at Jamestown Community College’s Weeks Gallery.
P-J photo by A.J. Rao 

While the phrase “Made in China” is ubiquitous in America, the journey — and sheer effort — behind it are so rarely explored.
After all, who are the factory workers behind our products? What are they like? How does everything travel thousands of miles to our local department stores and eventually our homes?
Indeed, thanks to three artists, whose documentary photography is displayed at Jamestown Community College’s Weeks Gallery, the answers are much clearer.
On Wednesday, Patricia Briggs, director of the Weeks Gallery, led an informal discussion about the exhibit — aptly entitled “Made In China” — with Monika Garami, one of the three artists featured.
The exhibit, according to Briggs, shows the link between China and America by depicting the movement of goods between the two — how they’re made in China and ultimately purchased by American consumers.
Photos ranged from a Chinese woman patiently sewing a piece of clothing to a large warehouse in America brimming with Chinese-shipped containers.
Included are photographs from Brian Ulrich and Youbing Zhan, the latter of whom is a Chinese factory worker turned journalist, who after taking photographs of his fellow workers, inspired the idea for the exhibit itself.
Briggs said she hoped Garami, an award-winning nature and landscape photographer, originally from Hungary and now a resident of Warren, Pa., could add a local angle to Youbing Zhan’s work.
“This was the first time I’ve ever done documentary photography,” Garami said. “It was a great learning curve for me, but I really enjoyed the process. I met so many people and formed so many relationships.”
“And by bringing people information that they wouldn’t normally get to know about, it inspired me to do more.”
Garami, who’s also an employee of Blair Corporation, focused her efforts on Chinese-made clothing as it made its way to Bluestem Brands distribution center in Irvine, Pa.
Her black-and-white photographs capture the shipping port at Bayonne, N.J., where containers from China are first unloaded onto American soil by large, automated cranes. She also captures the inside of a semi-truck’s trailer, filled with packages headed to department warehouses.
Garami described the whole process as a “monster of an operation,” one that baited her to learn more, and in the process, face increasingly tougher obstacles.
It was nearly a yearlong process, she said, filled with delays relating to background and security checks via the port authority, and approvals from Blair Corporation management. In the end, she added, many of her photographs were forced to be deleted for security concerns.
“They were very particular on what I could and could not show,” said Gerami, with a smile.
At the conclusion of Wednesday’s discussion, Gerami described her inclusion at the Weeks Gallery as a “great honor.”
“I didn’t think in a million years that I’d ever be in the Weeks Gallery,” she said. “Everything they’ve done has been incredible … and it has been an amazing experience.”

Sunday, 4 December 2016

Lectures on documentary photography

 Stuart Franklin 

The MA in Film Studies, offered through the Faculty of Arts with the support of the Ministry for Tourism and the Malta Film Commission, is currently hosting Stuart Franklin, who is delivering a series of lectures on documentary photography.
Stuart Franklin is a British photo-grapher and former president of Magnum Photos, of which he is still a member. He is also a Professor of Documentary Photography at Volda University College, Norway.
Franklin studied drawing under Leonard Mc Comb in Oxford, after which he studied Photo-graphy at West Surrey college of Art and Design between 1976 and 1979. After receiving his first BA, Prof. Franklin read for a BA in Geography at the University of Oxford, winning also the Gibbs Prize for Geography. He was awarded a Doctorate in Geography from the University of Oxford in 2002.
Prof. Franklin’s photography deals mostly with global affairs, human tragedy and environmental issues
Prof. Franklin’s photography deals mostly with global affairs, human tragedy and environmental issues. He photographed the civil war in Lebanon, unemployment in Britain, famine in Sudan and the Hysler Stadium disaster while he worked for the Agence Presse Sigma in Paris between 1980 and1985. His effort in documenting human strife has won him a Christian Aid Award for Humanitarian Photography in 1985. He became a full member of Magnum Photos in 1989 after joining in 1985. One of the Tank Man photos he took while he was covering the Tiananmen Square uprising was published in Time Magazine and for which he won a World Press Photo in 1985.
Prof. Franklin’s ecological concern was highlighted when he travelled with Greenpeace to Antarctica. He also covered about 20 stories for National Geographic between 1991 and 2009, including Inca conqueror Francisco Pizarro, the hydro-electric struggle in Quebec and places such as Buenos Aires and Malaysia.
In October 2008, Thames and Hudson published his book Footprint: Our Landscape in Flux, which is a haunting photographic rendition of Europe’s changing landscape. In 2009, Prof. Franklin curated an exhibition in Gaza titled Point of No Return and has afterwards focussed on a landscape project in Norway, titled Narcissus, which was published in 2013.
Some of his recent projects involve working with doctors in Syria and immigration in Calais. His most recent book was published by Phaidon in April 2016 and is called The Documentary Impulse. The book revolves around the nature of truth in reporting and the drive towards self-representation spanning form 50,000 years ago with cave paintings and journeying through the various impulses that have guided documentary photography along its differing tracks for 200 years.

Indore: A budding engineer with passion for photography

  https://floatingpointimages.s3.amazonaws.com/actual/550d2c494ec0a40c34d9a399.jpg

Indore: “Photography is the only language that can be understood anywhere in the world.”
Avi Jain, a 20-year-old city lad is pursuing civil engineering but his passion is ‘photography’. Whatever he clicks becomes a perfect picture – whether it is wildlife, forest, mountaintop or routine activities.
“I believe that I am a born photographer. I look various angles for a perfect shot as my eyes act like lenses. I have not taken any training for photography or anyone in my family was a photographer but it seems that I have the talent to click the moment,” Avi said.
Son of a Central excise officer, Avi chose civil engineering as his career to turn his imaginations into reality but photography is his passion.
“I have clicked more than 4000 photos, mainly of nature and wildlife. In the age of 20, I have visited more than half a hundred places to get a perfect shot. I have travelled from Kashmir to Kanyakumari but I think I have captured nothing much yet,” he said.
Avi has travelled from Ladhakh to Kanyakumari for capturing a memorable moment recently. “I have captured many memorable moments and have won various awards on state and city-level for the same. However, I still believe that I haven’t seen anything yet as I want to capture most place in the country and dream to see all the wonders of the world through my lens,” the young photographer said.
Earlier, his family members opposed to his decision of becoming a photographer but they started appreciating him when he received various awards including the best nature photograph in ‘PIxelwala.’
“I have a collection of more than 3000 photographs of nature and wildlife. I have visited many of the national parks. I do professional and fashion photography when I am not travelling to capture nature’s beauty,” the civil engineering student added.
He learned photography from city’s well known photographer Pawan Pawar and Wales’s Andy Rouse is his ideal photographer.
“I heard some famous lines of Robert Frost,’ Miles to go before I sleep.’ I also follow the same thing and believe that I have ‘millions to click before I sleep’,” he chuckled.

Saturday, 3 December 2016

HISTORICAL PHOTOGRAPHIC TECHNIQUES

 https://cdn.tutsplus.com/photo/uploads/legacy/175_historypart1/1.jpg

Historical photographic processes

Thanks to developments in photographic technology in recent years, the creation of technically perfect photographs is becoming a simple matter, even for those with no specialist knowledge. Digital photography can now be used very easily for purposes of information and documentation, and traditional photography can hardly compete with it in this area.
Of course, if we examine the potential of digital photography for individual artistic creation, it soon becomes clear that formulaic photo-editing programs, and the essential sameness of digital prints, even when the photographs are of completely different types, lead to a certain predictability in the results. The photographs are perfect, but all very much alike.
The easier it becomes to take digital photographs and prepare them for printing, the more likely it is that people will want to return to the techniques of traditional photography for their creative efforts, or to combine the techniques of digital and traditional photography, especially when producing the final version of a photograph – in the creation of a unique, artistic original, or in other words, in the actual process of transferring the picture to paper.
One of the basic characteristics of traditional photography, based on the sensitivity of silver salts to light, is the fact that the photographer can carry out many of the processes himself, adding his own creative touch. The final photograph can take many different forms. Each picture is a unique original. This variety in working methods, the utterly individual character of the result, and the fact that we are always producing an original work, will undoubtedly enable traditional photography to hold its own, though now in the role of an artistic technique.
If we look abroad, we find that ‘alternative’ photographic techniques are steadily gaining in popularity. These are in fact revived historical techniques dating from the beginnings of photography. In the USA, there was an increased interest in the 1980s, but this has increased further in the last few years. Processing kits for practically all the processes ever used are available on the market there. Although some are rather expensive, people buy them. A particular favourite is platinotype, despite the fact that the set of processing chemicals costs about $130. There have been dozens of US publications on the subject, regular creative workshops are organised and there are many articles on the internet, where there is also a discussion group.
Old photographs have a charm of their own. They are unreproducible, each is a unique creation, and even when several are printed from a single negative, no two are exactly the same. A high proportion of personal creativity goes into each photograph. Every picture is different – produced by a different process, on different paper, with different tonality. Photographs printed in the modern minilab, though they are cleanly produced, free of grain and in perfect colour, are worlds apart from carbon or platinum prints.
We know from the history of photography that “high-grade” printing methods survived for a long time. For example, many of our photographers continued producing oil prints and bromoil prints until the 1930s, although gelatine silver-bromide paper – of a type which is still used today, without any substantial changes – had long been widely available. Why did people continue so long with those laborious, time-consuming processes? Perhaps because their greater “malleability” brought greater pleasure and satisfaction in the results.
Those who are interested in individually oriented creation find even greater possibilities in historical photographic processes than in classical photography: not only is there a range of processes (salt process, cyanotype, platinotype, oil print etc.), but there is a choice of methods for achieving the final result (sensitising solution, type of paper, method of processing etc.).
In today’s conditions the historical processes most widely used are those which involve copying a negative. Sensitising the paper for copying is much more practicable than, for example, preparing light-sensitive glass plates for the collodion process. This means that the first part of the negative-positive process, i.e. the negative, has to be achieved by other means.
The old photographic techniques all involve contact printing, so we need a negative of the same size as the final photograph. In classical photography, this means either photographing directly in large format, or making a duplicate negative of the required size. Only a photographer with a fair amount of experience and a well equipped darkroom can handle this task.
Digital technology now makes it possible to create negatives without a darkroom. Many believe it is precisely this fact that has contributed to such an upsurge of interest in historical methods in the last few years.
In any case, historical photographic techniques do not require a conventional darkroom. The sensitive paper is prepared and processed with an ordinary low-wattage tungsten bulb. For the exposure, an enlarger is not necessary; a wooden contact-printing frame with glass is all that is needed. The exposure can be made outdoors, for example on a balcony.
With its freedom from conventional photographic technology, this entire creative field is opening up to people with no photographic background – all you need to do is print the negative on transparent film, coat suitable paper with the chosen sensitive solution, make a contact copy, and then process the picture in low-intensity artificial light.
There are many different processes to choose from – within the range of what is affordable, of course. If you make a pinhole camera and use the salt process, you’ll get pictures at less cost than with classical photography. But if you choose the higher-grade platinum process, you may spend ten times as much.
One thing is certain: the pictures will be interesting and nice to look at, whichever of these processes is used – even the cheapest, cyanotype. The high proportion of handwork clearly plays a role here, lending a touch of “artistry”.
In the Czech Republic, historical photographic processes are of course still waiting to be discovered. The sets of chemicals needed for processing are not yet available on the Czech market, and buying them from the USA is probably rather expensive for the average Czech. There is no literature in this field in Czech. Foreign books are difficult to track down and are expensive. There is some information on the internet, but for the moment, of course, only a few people can read English. And of those people, not many will start trying things out for themselves – they would have the difficult task of tracking down the chemicals and trying everything from scratch, with only the literature to guide them. Far better to start on the more complex processes when someone has shown us, first hand, the methods they use and the potential difficulties. We will be more inclined to try things out for ourselves if we see some fine pictures at an exhibition or in a friend’s collection. For the moment, that’s still something to look forward to.

Types of historical contact processes

1. Processes based on the light sensitivity of silver salts
The sensitive material is silver chloride and the resulting image is formed by particles of silver. Silver chloride can be dispersed in various types of binding agent.

The salt process (salted paper prints)
Suitable paper is coated with a solution of sodium chloride (table salt) and then, after drying, with a solution of silver nitrate. This produces silver chloride, which is sensitive to light. The picture is produced directly upon exposure (contact process). After exposure, the surplus silver nitrate and silver chloride are washed off in water, and a thiosulphate fixer is used. The image is formed by fine particles of silver anchored directly in the mass of the paper, without a binding agent. Because of the large number of silver particles and the fact that they are finely dispersed, the picture is reddish-brown in colour (as with all other contact processes). The salt process was first used by Fox Talbot in 1834. Salt papers were most widely used in the years 1840-1850 (alongside daguerrotypes). Most of the photographs on paper dating from those years were produced directly by the salt process. Some of them are toned with salts of gold or platinum and their colouring varies – often brownish-black, blue-black or a neutral grey-black. A gold or platinum image is not susceptible to changes due to the surrounding atmosphere, and is notably long lasting.
For its simplicity and convenience, and especially because it is so easy to understand, the salt process is very suitable for use in today’s conditions. It is not as problem-free as, for example, the Van Dyke brownprint (see below), but the knowledge that we are working just as photographers did in the 1850s is something quite magical.
In the National Technical Museum, we have devoted a great deal of attention to reconstructions of the salt process because this was the process used in 1835 by the inventor of photography on paper, Fox Talbot, for preparing his first pictures. A further advantage is the fact that the mechanism and chemical reactions of the salt process are so simple and straightforward that even a reasonably attentive schoolboy can easily understand them.

The albumen process
Thin paper is laid on the surface of some salted egg white. After drying, it is coated with a solution of silver nitrate. As in the salt process, the image is formed by fine particles of silver, but these are not embedded directly in the paper, but in the layer of the binding agent of egg white which the surface of the paper is coated with. This makes it possible to achieve a more saturated black and greater brilliance and contrast.
The albumen process was most widely used in the years 1855-1895 – most of the photographs dating from those years are on albumen paper. The image, as in the case of the salt process, is reddish-brown. It is often toned with gold or platinum. This increases its resistance to environmental factors. But albumen photographs are almost always yellowed in the lighter parts, because of the ageing of the binding agent itself – egg white.

Collodion papers
Silver chloride is held in a binding medium consisting of a mixture of collodion and camphor. Collodion is cellulose tetranitrate dissolved in ether and alcohol. On a paper base, the binding agent containing silver chloride (the emulsion layer) is covered with a layer of barium sulphate with gelatine. The image is formed by fine particles of silver in the layer of binding agent, and as with other contact processes, it is reddish-brown. The surface may be either glossy or matt.
Collodion papers were very popular and were used from 1865 until the 1920s. Most studio portraits from that time were taken on collodion paper. They were often toned with salts of gold or platinum.

Gelatine papers
In appearance, these are almost indistinguishable from collodion papers, but instead of collodion, gelatine is used as the binding agent. They were used from 1884 until the 1920s, concurrently with collodion papers, but they were too expensive to compete with collodion. Once again, the image was reddish-brown, and was often toned with gold or platinum.
All the processes mentioned so far are “contact” processes, in which the picture is produced during the exposure, and subsequent processing merely gives it definition and stabilises it. This distinguishes them from the other group of processes, known as “developing” processes, in which only a faint (or even invisible) image is created during exposure, and is developed by subsequent processing. We shall discuss some developing processes below.
2. Processes based on the light sensitivity of iron salts
These processes use ferric salts of organic acids which, under the action of light (its ultraviolet component), are reduced to ferrous salts. For example, ferric oxalate is reduced to ferrous oxalate. This ferrous oxalate is retained as a reducing agent which reduces the ions of noble metals such as silver, platinum or palladium into a solid metallic state, creating the picture. The sensitive solution is applied directly to the paper, so that the picture is anchored directly in the paper without a binding agent.
Instead of the salt of a noble metal, the cyanotype process uses potassium hexacyanoferrate(III), which, with a ferrous salt (produced from a ferric salt under the action of light), creates a blue pigment.

The cyanotype process
The sensitising solution contains iron ammonium citrate and potassium hexacyanoferrate(III). Developing is done in water. Depending on the method used, the image is created in Turnbull or Prussian (Berlin) blue. The image is produced directly during exposure; this is therefore a contact process. It was in use from 1842 onwards.
Cyanotype is, relatively speaking, a very simple, quick and inexpensive process. For this reason, it is one of the first processes tried by many of the people who are now turning to historical photographic techniques. If the picture is toned, there are many options. It can be toned with tea, coffee or tannin after previous bleaching with alkali. Salts of lead or copper are also used. Depending on the toning used, it is possible to obtain various shades of grey, black, brown, red or yellow.

The callitype process
The sensitising solution contains ferric oxalate and silver nitrate. The image is formed by metallic silver. During exposure, only a very faint image is produced; this is intensified by subsequent development in a solution of borax or sodium potassium tartrate. This is therefore a developing process. It came into use in 1844.

The platinotype process
The sensitising solution contains ferric oxalate and potassium chloroplatinate. A faint image is produced, and is developed in a solution of potassium oxalate or some other organic acid salt. The image is formed by particles of metallic platinum embedded directly in the paper (process in use from 1873 onwards).
Platinotype is a very popular process in the USA, despite the fact that it is, relatively speaking, quite expensive. Apparently the US tradition plays a part here – a number of famous photographers in the last century used this technique to create many impressive photographs, which people come across in exhibitions, and quite naturally this stimulates their desire to make their own platinum prints. Another reason may be the fact that this technique produces completely unique and valuable pieces of work, which may survive not only us, but perhaps several generations to come, without any deterioration.

Van Dyke brownprint
The sensitising solution contains iron ammonium citrate and silver nitrate. The image is created during exposure – a contact process. This is followed by washing in water and fixing in thiosulphate. The image is formed by metallic silver of a reddish-brown colour, without a binding agent, directly in the paper. The process was in use from 1889 onwards.
The Van Dyke brownprint is another relatively simple, rapid process which may present fewer problems than other processes. With suitable paper, a satisfying result can be achieved on the very first attempt. The processing of the exposed image is simple, too – no chemicals other than fixer are required.
The process as a whole is quite inexpensive. The sensitising solution contains just three ordinary substances. One of them is silver nitrate, which is quite expensive, but because only a little sensitising solution is needed to coat the paper, the process does not cost too much. And the resulting picture looks every bit as good as, say, a platinotype, which is considerably more complex and many times more expensive to produce. But if we still wish to achieve the qualities of a platinotype by this process, we can tone the finished picture with salts of platinum or palladium, or both together. This gives a platinum/palladium-based picture, i.e. a copy identical in quality at about one quarter of the price of a platinotype. Of course we choose only the really successful pictures for toning, which is likely to mean a further saving.
The main advantage of platinotype is its durability. But if we want to use the old processes mainly for pleasure, the advantage of unlimited durability is probably not so essential. Although silver-based photographs produced by contact processes are less stable than those on modern baryta papers, our pictures will probably survive us just the same. Although the surviving photographs on salted papers from the 1850s have faded considerably, the images are still clearly visible and have their own charm.
The relative affordability and advantages of the Van Dyke brownprint have led us, at the National Technical Museum in Prague, to start with this process as the first to be presented in our creative workshops, “Reconstruction of Historical Photographic Processes”. These workshops are intended for interested members of the public, and the aim is that participants should become sufficiently familiar with the old processes to be able to use them at home. We will provide them with the necessary chemicals for this purpose.
3. Processes based on the light sensitivity of bichromated gelatine or gum arabic (high-quality prints)
These are based on the fact that bichromated gelatine and gum arabic (known as “glue stock”) harden in light, so that that they no longer swell in water and are not soluble in it. The parts of the picture which have not been exposed to light remain water soluble and are washed away during development in water. In the case of a pigment print, the image is formed by pigment which is finely dispersed in the binding medium when the sensitive layer is prepared. In the case of oil and bromoil prints, the image is formed with colour applied subsequently to the relief which was produced in the gelatine when the light-exposed surface was washed in water. In this way it is possible to obtain sharp, high-quality halftone images.
Before exposure, the paper is sensitised with a solution of potassium or ammonium dichromate.
The paper is exposed to light with a significant proportion of UV radiation, and developed in water; no fixer is used.

Pigment prints
The sensitive paper is prepared as follows: suitable paper is coated with a layer of gelatine containing finely dispersed pigment. This may be a pigment powder or carbon powder – in which case, it is called a carbon print.
Before exposure, the paper is sensitised by soaking in a solution of potassium bichromate. After drying, the paper is exposed to produce a contact negative. The exposed paper is soaked and then pressed onto “transfer paper” (paper coated with a layer of pure gelatine). The image from the original paper adheres in its entirety to the transfer paper, so that its bottom layer is now on the top. All parts of the original gelatine with pigment which were not exposed to light (and are therefore not hardened) can now be washed off with water. This produces an image which has the thickest covering in the places which were exposed to the most light, as a result of the hardening of the pigmented gelatine. In this way, a positive is obtained from the negative. The original paper, on which the exposure was made and from which the entire image was detached, is then discarded.
Pigment prints, particularly carbon prints, were once very popular among our photographers, and we often see them in exhibitions. If you learn to prepare pigment paper yourself, you will find it is a relatively simple and rapid process. Since inorganic pigments are very stable, the picture is almost as durable as a platinotype.

Gum prints
The paper is coated with a solution of gum arabic with potassium dichromate, to which watercolour or tempera paint or powder pigment has been added. After drying, the negative is copied in sunlight, in a contact printing frame. After exposure, the picture is only slightly modulated. It has to be developed in cold water, which dissolves the unexposed areas, leaving the exposed areas (the shadows in the picture). Because of the thinness of the layer, the exposed parts reach the surface of the paper and adhere firmly to it, so that the picture, unlike pigment prints, does not need to be transferred. During development in cold water, the unexposed parts are washed away, with the colour, as far as the surface of the paper. The picture does not require any fixing, because the chrome salt is washed away as well.
Gum printing is thus a very simple method, but in order to get good results, we need to gain some experience. We also have to accept the fact that the single-stage gum print described above cannot reproduce all the halftones of the negative. With the single-stage process, there is always a certain amount of detail missing, either in the highlights or in the shadows – depending on how the sensitive layer is prepared, and the choice of exposure and development times.
A picture with saturated shadows and more detailed highlights can be obtained only by several stages of re-copying. After the first development and drying, which provides only middle tones, the picture has to be coated again with a sensitive solution containing less gum arabic and colour; it is copied again and developed until the highlights appear. After drying, it is coated again, with a solution containing the largest amount of gum arabic and colour, and copied for a shorter time, then developed until only the deepest shadows remain.
For a good rendition of tones, it is often necessary to make a second and third print. Usually it is also necessary, between individual prints, to size the paper again, because the original sizing agent is washed off the paper during processing in water. If the paper is not re-sized, the sensitive solution penetrates deep between the fibres of the paper and cannot be washed out during processing, so that there is a haze of colour even in the clearest highlights.
A multilayered gum print with well reproduced halftones is thus quite labour intensive and cannot be prepared in one day. But even with single-stage gum printing, it is possible to obtain perfectly good pictures, provided we accept the limitations of the process and choose suitable motifs, and perhaps copy only the middle tones. Fortunately, gum printing is not, for us, the only possible technique, and negatives in which we need a more perfect rendition of halftones can be processed more simply – for example, by pigment printing.

Oil printing
Based on the principle that a gelatine layer sensitised with dichromate hardens in the places where it is affected by light, so that these parts do not swell during subsequent soaking.
After a contact print has been made, the picture is soaked, and the places unaffected by light become swollen, while the exposed parts do not. Thus, during soaking, a relief is created, in which the raised areas correspond to the highlights and the hollows to the shadows. When thick, oily colour is applied to this moist, swollen gelatine relief, it is left adhering only to the light-exposed parts (not swollen, and therefore forming hollows), and the more these places were exposed to light (and therefore hardened), the greater the amount of adhering colour. This produces a picture with all the halftones. A positive is produced from the negative.
Colour is applied with special brushes, and more or less colour can be applied, more or less thickly, in different places. The density and tonality of various parts of the picture can therefore be influenced to a significant extent. This process differs from pigment and gum printing in that these contain colour before the contract print is made, while in oil printing it is applied afterwards, in a chosen quantity. The advantage is that coloured parts with which we are not satisfied can be cleaned with petrol.

Bromoil prints
These differ from oil prints in that an ordinary photograph, i.e. a silver bromide positive, is used for preparing a swollen-gelatine relief. The photographic paper we use should not have an excessively hardened gelatine layer, because this would not swell much in water. Many types of paper on a resin coated (RC) base, and some traditional baryta papers – provided they are not intended for glazing, and therefore harder – are suitable.
The photograph with well defined highlights and shadows is bleached in a solution of copper sulphate and potassium dichromate. It is then washed, fixed, washed again, and finally dried. The dried picture is soaked and left to swell, and is then coated with oil pigments, as in the case of oil prints. Nowadays, instead of the traditional method of dabbing the colour onto the picture with a fitch brush, the colour is sometimes applied with a foam roller.
The coloured picture can be printed onto another piece of ordinary paper. The picture can then be coloured again, and it is also possible to create a series of prints.
The end result is just as good, whether it’s a bromoil print or an oil print. But bromoil printing has many advantages. In particular, the fact that it does not require a large negative, because you work directly with an enlargement the same size as the final picture. There is also no need to make contact prints in sunlight using a contact printing frame. This removes the need for difficult decisions about the necessary exposure time. Another advantage is that you can easily influence the degree of contrast in the final picture through the choice of the grade of photographic paper used for preparing the initial positive. But it should be emphasised that the relative ease of preparing the basic gelatine relief in no way relieves us of the need to become thoroughly proficient in the next stage, the application of colour, which requires a high degree of skill and plenty of experience. You can’t expect successful pictures at the first attempt.
Because of their advantages, bromoil prints were very popular with our photographers until about the 1920s, and they are often seen in exhibitions.

Choosing the process
If you want to try a historical process yourself, it’s a good idea, initially, to choose one of the simpler ones that doesn’t require too much outlay. Fortunately, even with the simpler and less expensive processes, you can obtain pictures which are just as good as with the more demanding and costly ones. Every process has its own character and possibilities. It’s just a matter of knowing it well and choosing the motifs to which it is best suited.
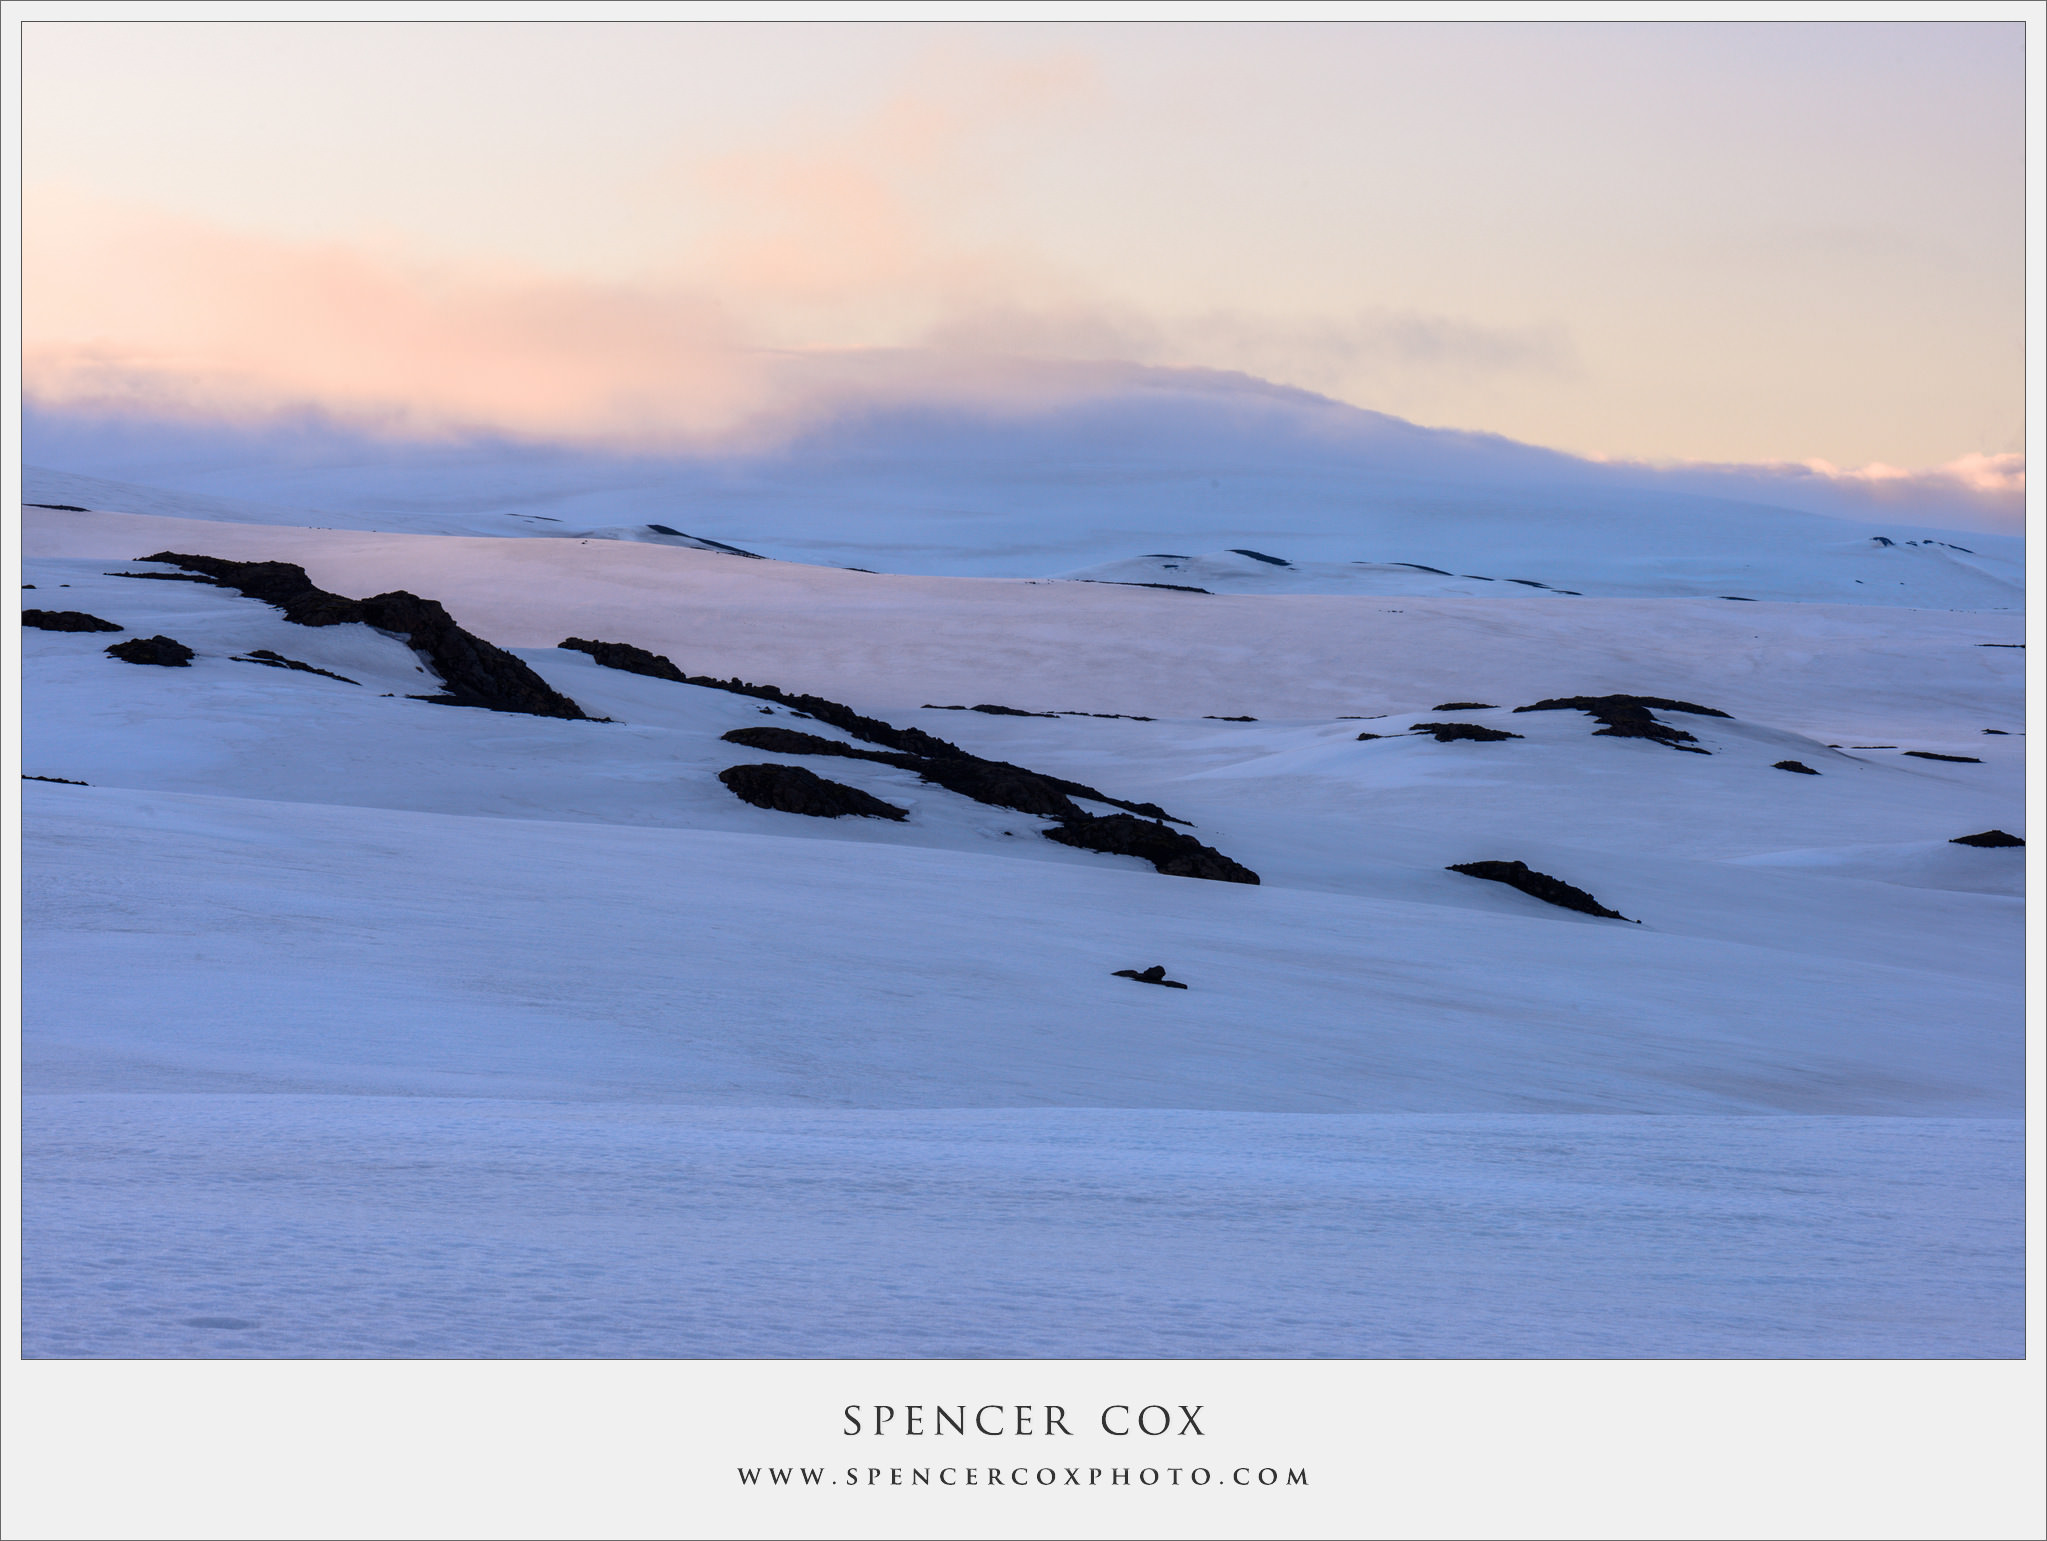
Even with the cheapest process, e.g. cyanotype, we can create very impressive photographs. But their intense blue colour is only suited to certain subjects – snowy or misty landscapes, for example. On the other hand, these subjects are not suited, for example, to the salt process. This gives a brown tonality in which snow or mist appears unnaturally brown. On the other hand, the salt process is suited to autumn pictures with fallen leaves.
So it’s best to choose processes which can be carried out with simple resources and minimal experience, and to select the subject matter accordingly. Such processes are, for example, cyanotype, the salt process and Van Dyke brownprint.
With these processes, you obtain a picture embedded directly in the fibres of the paper without a binding agent. The fact that the picture is on paper without a layer of binding agent, means that it has much in common with a lithographic print. Unlike ordinary photographs, these pictures do not curl up in heat. If you choose suitable colours and structures for preparing the paper, you can obtain really special, unreproducible originals.